User guide
The user guide focuses on the day-to-day authoring workflow: opening a project, recording and editing flows, running them, and understanding the evidence that comes back.
Typical authoring loop
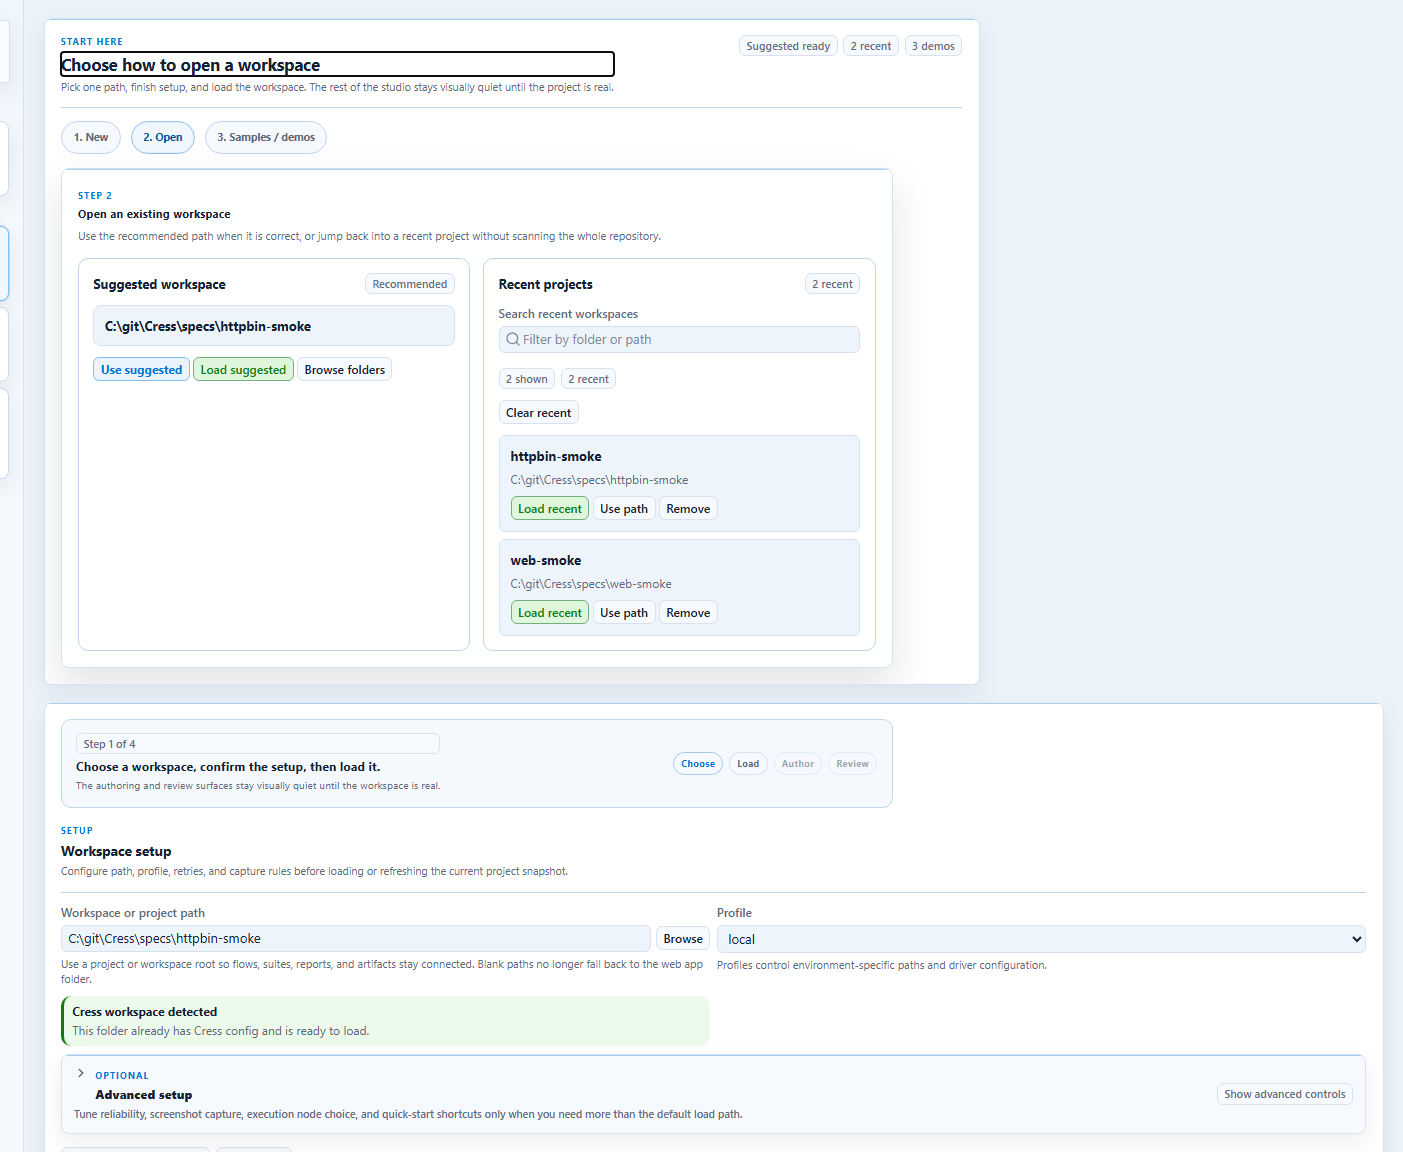
- Open the project in Studio or Studio Web.
- Record or draft a flow.
- Normalize the flow YAML in source.
- Validate and run the flow.
- Review results, screenshots, and reports.
- Commit the flow once it is deterministic.
Guide map
- Feature map
- Studio overview
- Desktop companion
- Recording workflows
- Authoring flows
- Running and debugging
- Testing CLI apps
- Testing services
- Testing web apps
- Testing desktop apps
- Framework integrations
- Framework demos and development-cycle integration
- Environment orchestration
Testing targets
These target-specific guides show how to apply Cress to realistic automation surfaces:
| Target | Best starting point | What the guide covers |
|---|---|---|
| CLI apps | Testing CLI apps | plugin-backed command execution, assertions, and evidence patterns |
| Services and APIs | Testing services | HTTP-driver workflows, service smoke tests, JSON assertions, and CI use cases |
| Web apps | Testing web apps | Playwright-backed browser flows, Studio recording, locator strategy, and mixed UI/API testing |
| Desktop apps | Testing desktop apps | Flawright-driven Windows automation, launch/attach patterns, locator strategy, and screenshot-heavy troubleshooting |
Running flows inside xUnit, NUnit, and MSTest
You can now generate framework-native C# tests that call the Cress engine directly. That lets:
- designers keep authoring in Studio and YAML
- product teams commit generated tests into existing test projects
- CI pipelines run Cress-authored scenarios beside the rest of the product suite
Start with the framework integration guide.
GUI and code working together
The strongest Cress setups combine:
- GUI-based authoring and evidence review in Studio or Studio Web
- code-based orchestration with AppHost, profiles, plugins, and generated xUnit/NUnit/MSTest tests
- environment-aware execution across services, browsers, desktop apps, and CLIs
See Environment orchestration for the end-to-end setup patterns.
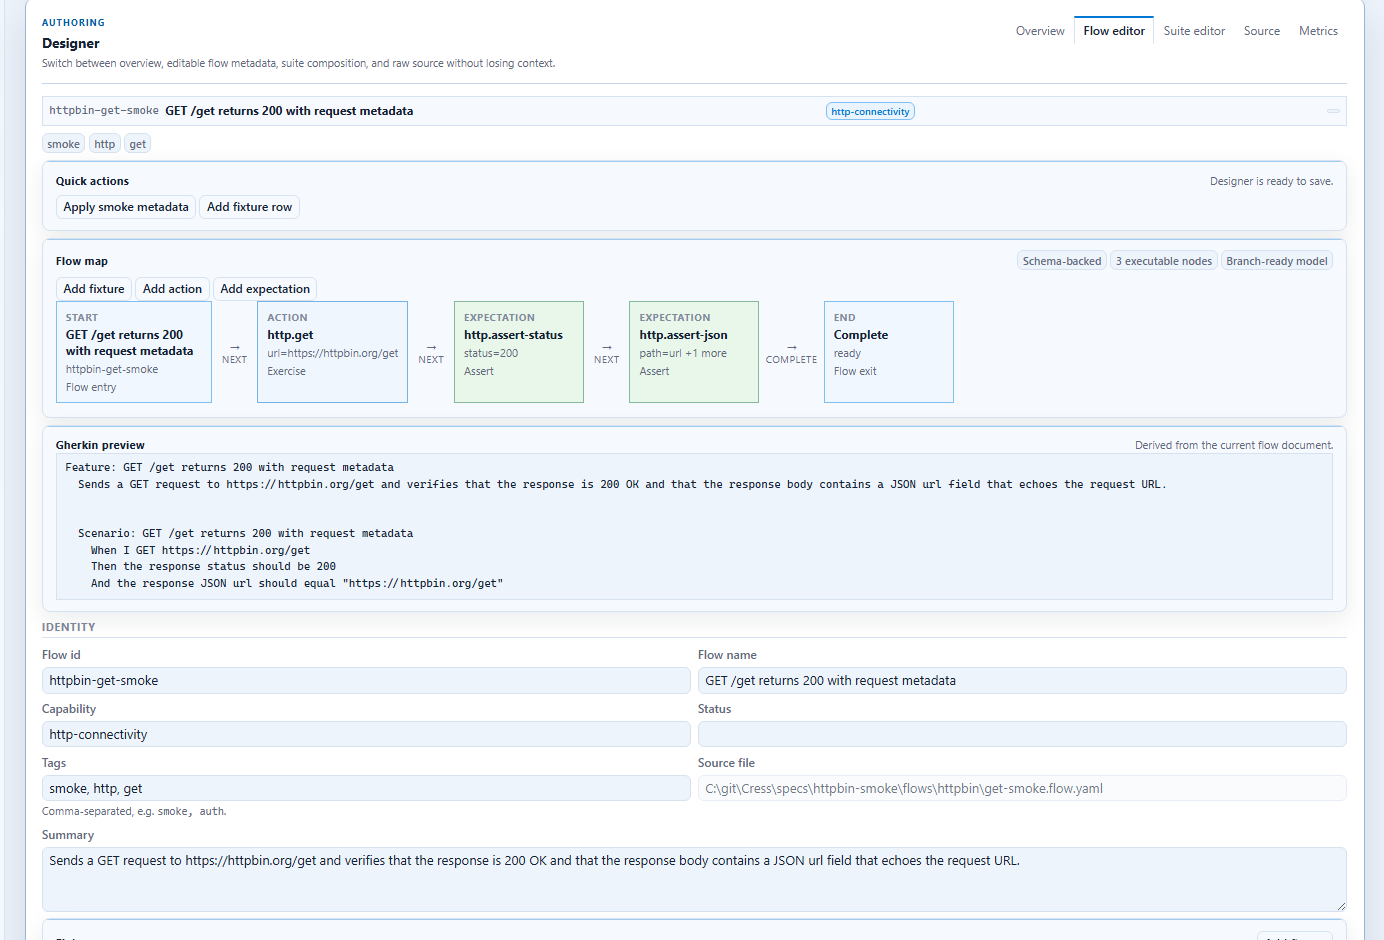
Where screenshots and wizard-style flows fit
The product uses recording pickers, source/designer surfaces, results panels, and metrics views as the key guided workflow surfaces. The pages in this section walk through those screens step by step with the repository screenshots.
The feature map is the inventory page that ties those workflow surfaces to their screenshots and should be updated whenever a feature changes.