Recording workflows
The recording flow is the closest thing to a wizard in Cress: you choose a target, capture the interaction, then refine the generated flow before trusting it in CI.
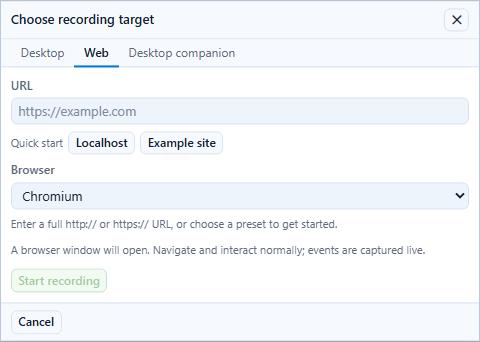
Recording flow for web targets
- Open the project in Studio or Studio Web.
- Start recording and choose the browser target.
- Perform the user journey.
- Save the draft flow.
- Open Source and normalize the output.
- Run the flow and inspect the evidence.
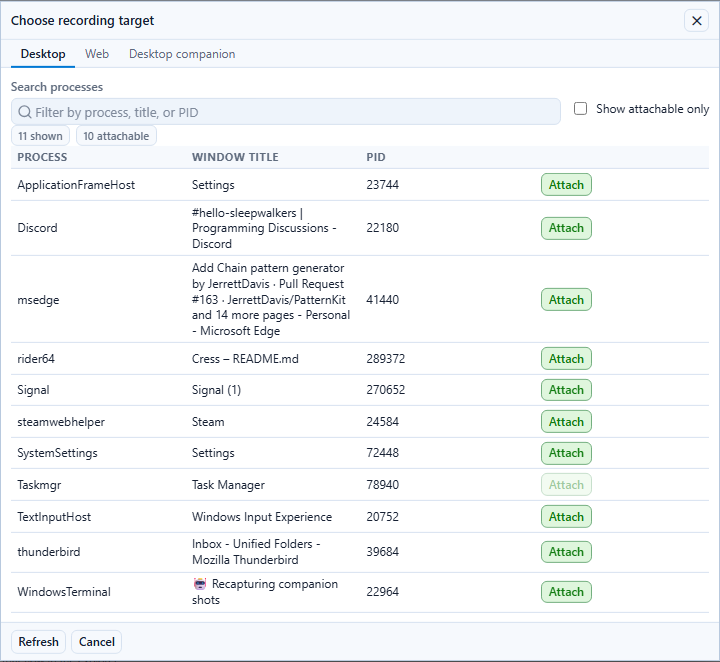
Recording flow for desktop targets
- Open the project.
- Start recording and choose the desktop target.
- Interact with the target window.
- Save the draft.
- Normalize the locators in source.
- Re-run and inspect screenshots.
Recording flow with the desktop companion
Use the desktop companion when you want a native manager plus an anchored overlay while still keeping Studio Web as the authoring surface.
- Start the desktop companion.
- Open Studio Web and switch the recording workflow to Desktop companion.
- Start the session for the target window.
- Interact with the app while the companion keeps controls near the titlebar.
- Pause, resume, or stop from the manager, overlay, or Studio.
- Save and normalize the resulting flow in Studio.
For the full walkthrough, installation, and feature breakdown, see Desktop companion.
What to fix after recording
Treat the first recorded draft as scaffolding, not the final artifact.
Priorities after recording:
- replace brittle selectors with
testId,role+label, orautomationId - add a meaningful
id,name, and tags - connect the flow to its capability
- move environment-specific values into profiles
- keep the path deterministic enough for CI
Review in source before you run again
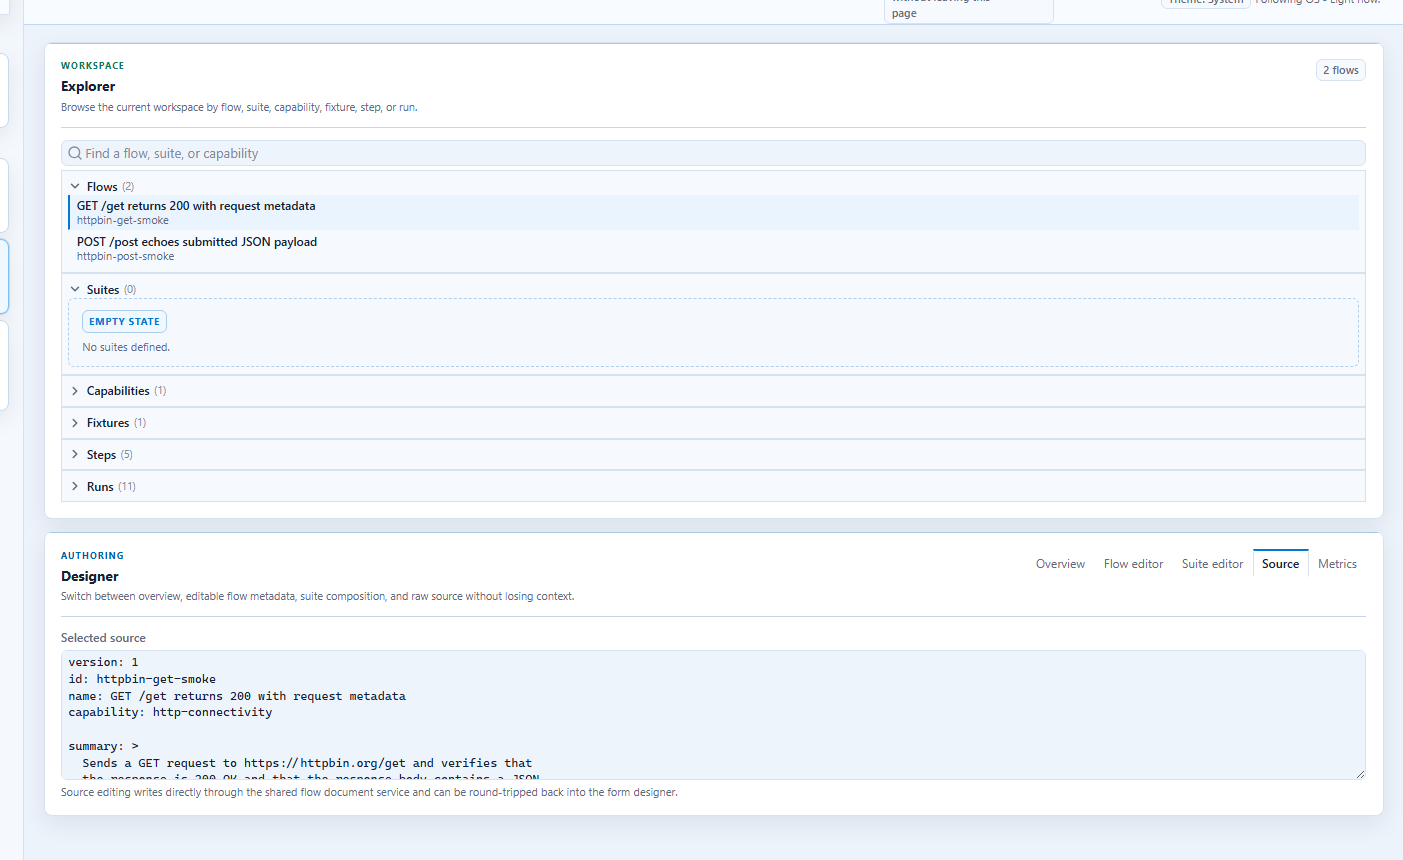
This is where teams converge on the stable version of the flow that they want to store in source control.
Validate with evidence
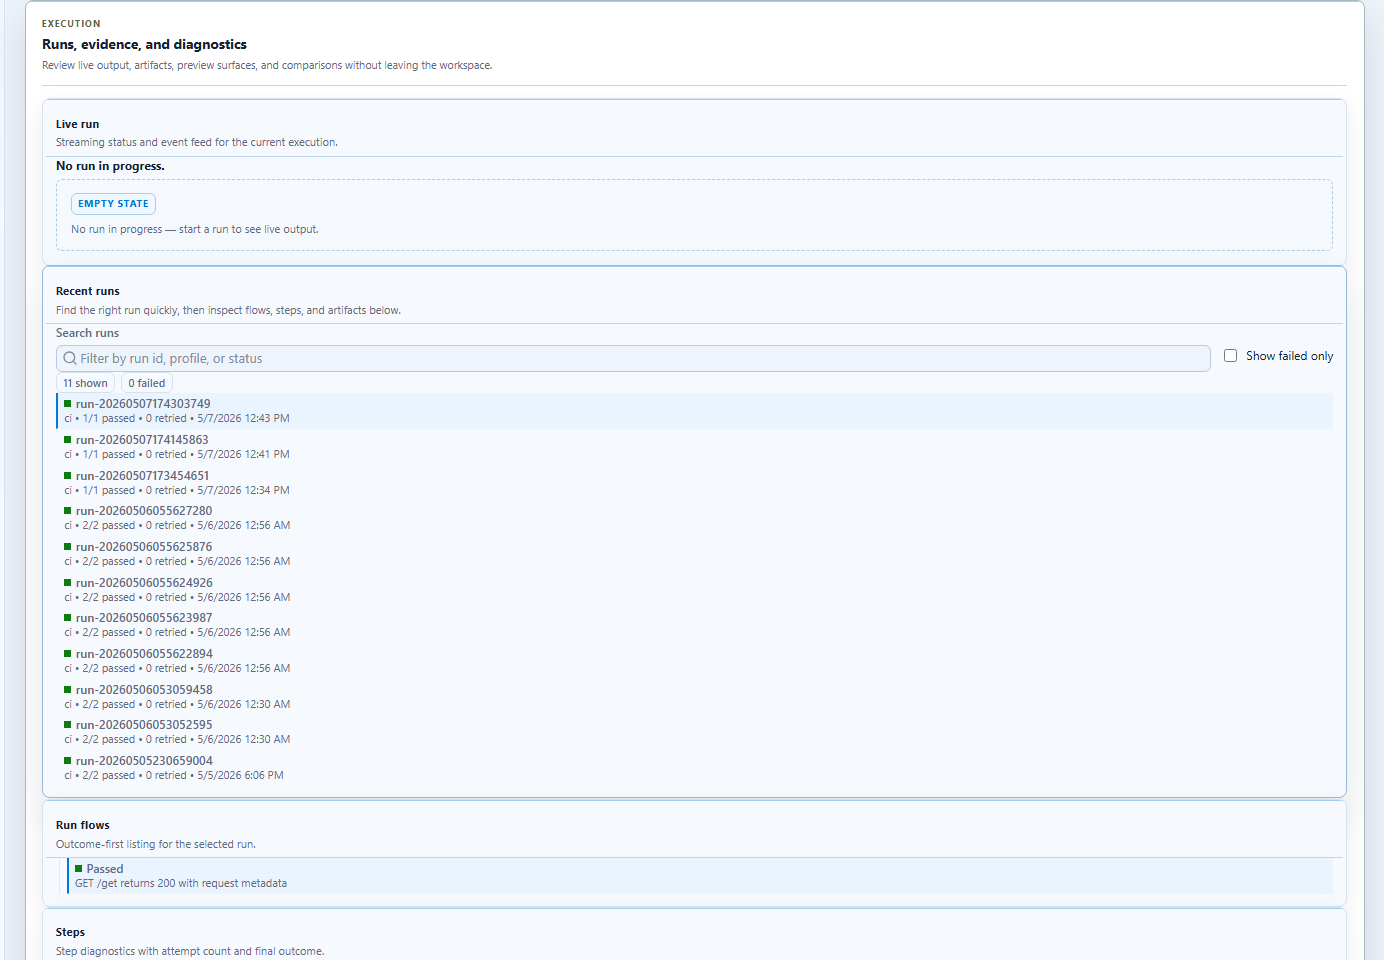
Run after every meaningful edit so the evidence stays close to the change that caused it.