Testing web apps
Web app testing in Cress combines flow YAML, Playwright-backed runtime execution, and Studio / Studio Web authoring so teams can move from recording to durable browser automation without losing product intent.
Recommended approach
Use this stack for web applications:
- the built-in Playwright runtime driver for browser execution
- Studio or Studio Web for recording and refinement
- flow YAML for durable source-controlled authoring
- HTTP steps when the scenario also needs service-level verification
This works especially well for:
- sign-in and onboarding journeys
- dashboard and reporting flows
- admin and back-office applications
- B2B portals with deterministic test accounts
- smoke and regression suites for CI
Tooling
| Layer | Recommendation |
|---|---|
| Runtime driver | playwright |
| Authoring surfaces | Studio, Studio Web, Source view |
| Sample project | specs\web-smoke |
| Diagnostics | validate, doctor, discover, run --dry-run |
| Evidence | screenshots, traces, reports, results panel |
Getting started
1. Create a project
dotnet run --project src\Cress.Cli\Cress.Cli.csproj -- init demos\web-portal
2. Enable browser support
drivers:
  playwright:
    enabled: true
  http:
    enabled: true
  flawright:
    enabled: false
Keep http enabled if you want setup or verification calls around the UI journey.
3. Configure the profile
profile: local
baseUrl: http://localhost:3000
timeouts:
  step: 30000
  expectation: 10000
evidence:
  mode: standard
variables:
  environment: local
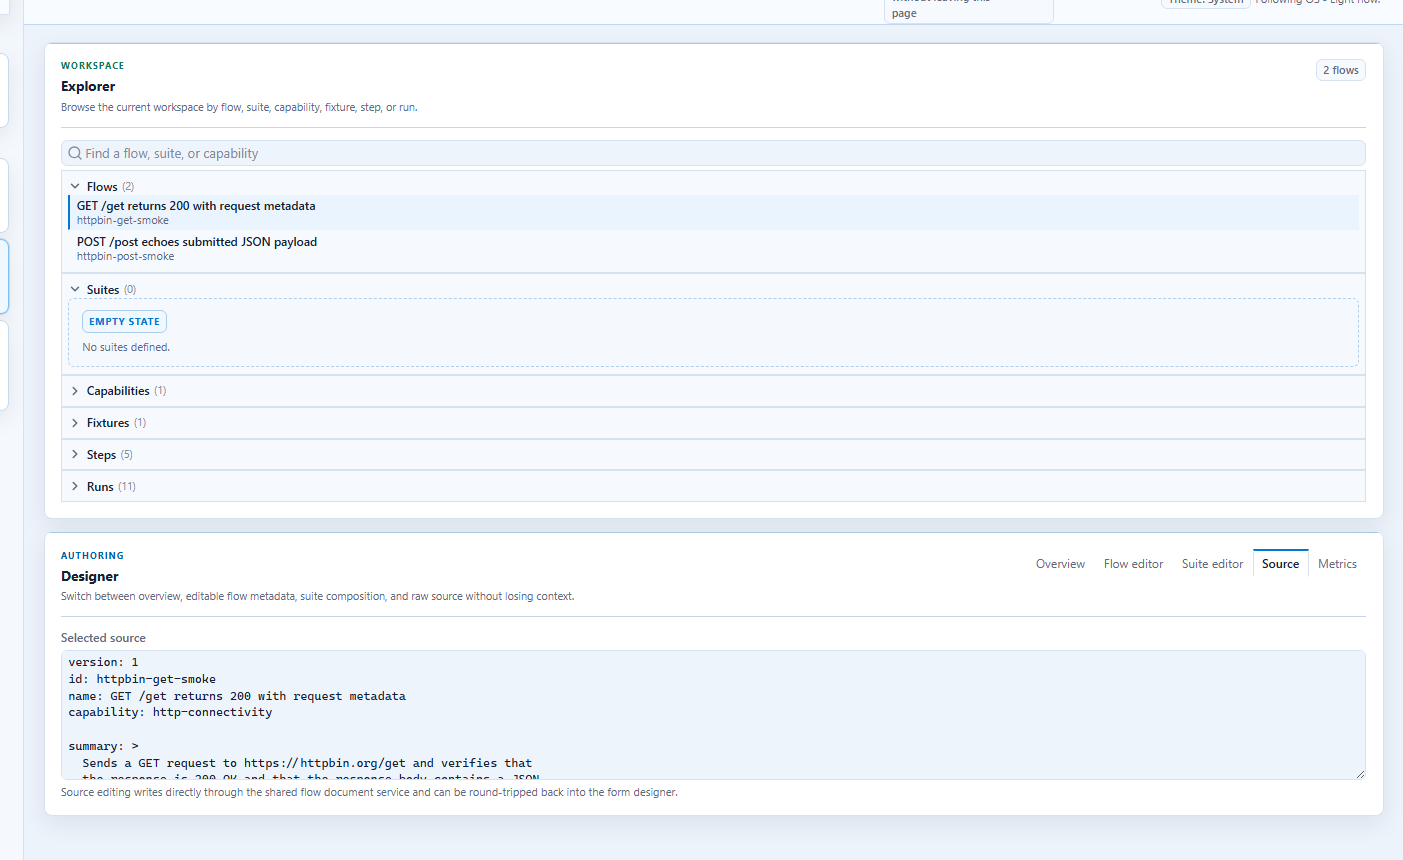
4. Launch Studio
dotnet run --project src\Cress.AppHost\Cress.AppHost.csproj --configuration Release --launch-profile http
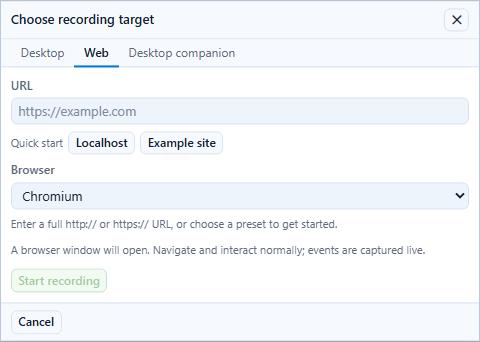
5. Record and normalize
- open the project in Studio or Studio Web
- start recording and choose the browser target
- perform the user journey
- save the draft flow
- switch to Source and clean up the locators
Locator strategy
Prefer locators in this order:
testIdrole+labelrolelabeltextcssSelectorxpath
Realistic example
Use case: an operations portal where a user signs in, searches for a report, and opens a detail page.
version: 1
id: operations.report-search
name: Operations user can find a quarterly report
capability: reporting-search
tags:
  - web
  - smoke
  - reporting

when:
  - step: browser.navigate
    with:
      url: http://localhost:3000/login
  - step: ui.fill
    with:
      testId: email-input
      value: user@example.com
  - step: ui.fill
    with:
      label: Password
      value: s3cr3t
  - step: ui.invoke
    with:
      role: button
      label: Sign in
  - step: ui.fill
    with:
      testId: search-input
      value: quarterly report
  - step: ui.press-key
    with:
      key: Enter
then:
  - expect: ui.assert-text
    with:
      testId: report-heading
      text: Quarterly Report Q1 2026
Step-by-step: smoke-test a local web app
This is the fastest path for teams that already have a dev server and want a realistic browser flow before recording a larger regression suite.
Goal
Open a local app, sign in, search, and verify that the results page loaded.
1. Start the app
Run the application locally so it is reachable at the baseUrl in your profile, for example http://localhost:3000.
2. Configure the project profile
profile: local
baseUrl: http://localhost:3000
drivers:
  playwright:
    enabled: true
  http:
    enabled: true
3. Record the happy path
- open the project in Studio or Studio Web
- choose the browser target
- sign in with a deterministic test account
- search for a known record
- stop recording and save the draft flow
4. Normalize the generated source
Move from brittle recorded selectors to durable ones:
- prefer
data-testid - use
roleandlabelwhen test ids are not available - keep hardcoded URLs and credentials out of the flow
5. Run the smoke suite
dotnet run --project src\Cress.Cli\Cress.Cli.csproj -- validate demos\web-portal
dotnet run --project src\Cress.Cli\Cress.Cli.csproj -- run demos\web-portal --profile local --report html,json
6. Extend it into a mixed UI and service flow
After the first browser test passes:
- seed data through
http.post - verify it in the browser
- confirm the final server state with
http.get - export JUnit or generated test classes for CI integration
Good use cases
Business smoke tests
Keep a small suite of high-confidence flows for:
- sign-in
- primary search
- primary creation/edit path
- a single high-value report or checkout path
Regression flows
Add deeper variations once the smoke suite is stable:
- role-based access differences
- error handling
- multi-step wizards
- export/download flows
Hybrid UI + service checks
Use HTTP steps before or after browser actions when you need reliable data setup or verification.
Practical command loop
dotnet run --project src\Cress.Cli\Cress.Cli.csproj -- validate demos\web-portal
dotnet run --project src\Cress.Cli\Cress.Cli.csproj -- run demos\web-portal --profile local --report html,json
dotnet run --project src\Cress.Cli\Cress.Cli.csproj -- run demos\web-portal --tag smoke --profile ci --report html,json,junit
Design guidance
- add
data-testidattributes to high-value workflow surfaces - make authentication and seed data deterministic
- keep flow values profile-driven instead of hardcoding environment details
- publish reports and screenshots from CI so failures can be triaged asynchronously