Environment orchestration
Cress works best when teams treat it as the layer that bridges authoring, orchestration, execution, and evidence across the full system under test. That can include multiple services, browsers, desktop apps, CLIs, and framework-native test suites.
GUI-based orchestration
From the GUI side, Cress gives authors a practical control loop:
- open the project in Studio or Studio Web
- record or refine a flow
- run the scenario
- inspect evidence
- iterate until the flow and the app contract are both stable
Code-based orchestration
From the code side, the repository already uses an Aspire AppHost to launch and coordinate the local authoring environment:
var builder = DistributedApplication.CreateBuilder(args);

builder.AddProject<Projects.Cress_Studio_Web>("studio-web")
    .WithEnvironment("ASPNETCORE_ENVIRONMENT", "Development")
    .WithExternalHttpEndpoints();

builder.AddExecutable("studio", studioExecutable, studioProjectDirectory)
    .WithEnvironment("DOTNET_ENVIRONMENT", "Development");

builder.Build().Run();
That pattern scales to product environments too: use your preferred environment orchestrator to start dependencies, then let Cress connect through profiles, drivers, and plugins.
The repository now also validates that orchestration layer directly through tests\Cress.AppHost.Tests, which uses Aspire's testing package to cover AppHost composition helpers, AppHost-started integration checks, and route-level end-to-end validation against the hosted studio-web resource.
Step-by-step: GUI-first environment setup
Use this path when a designer, QA engineer, or SDET is leading the first authoring pass.
1. Start the orchestrated environment
dotnet run --project src\Cress.AppHost\Cress.AppHost.csproj --configuration Release --launch-profile http
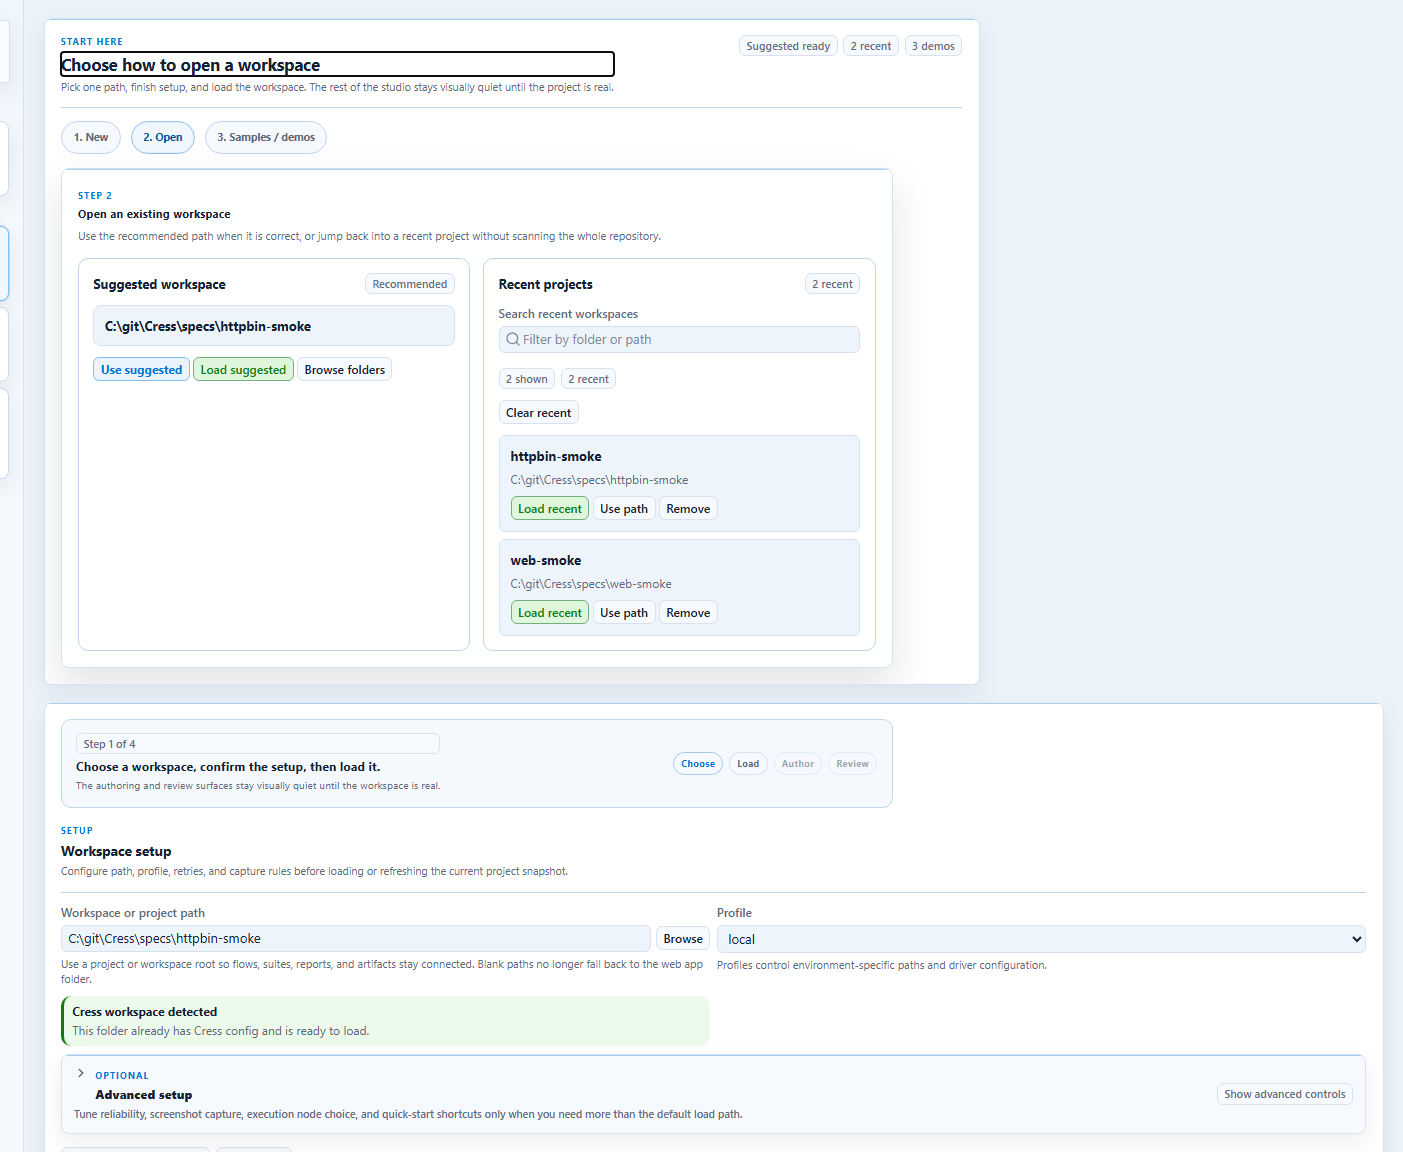
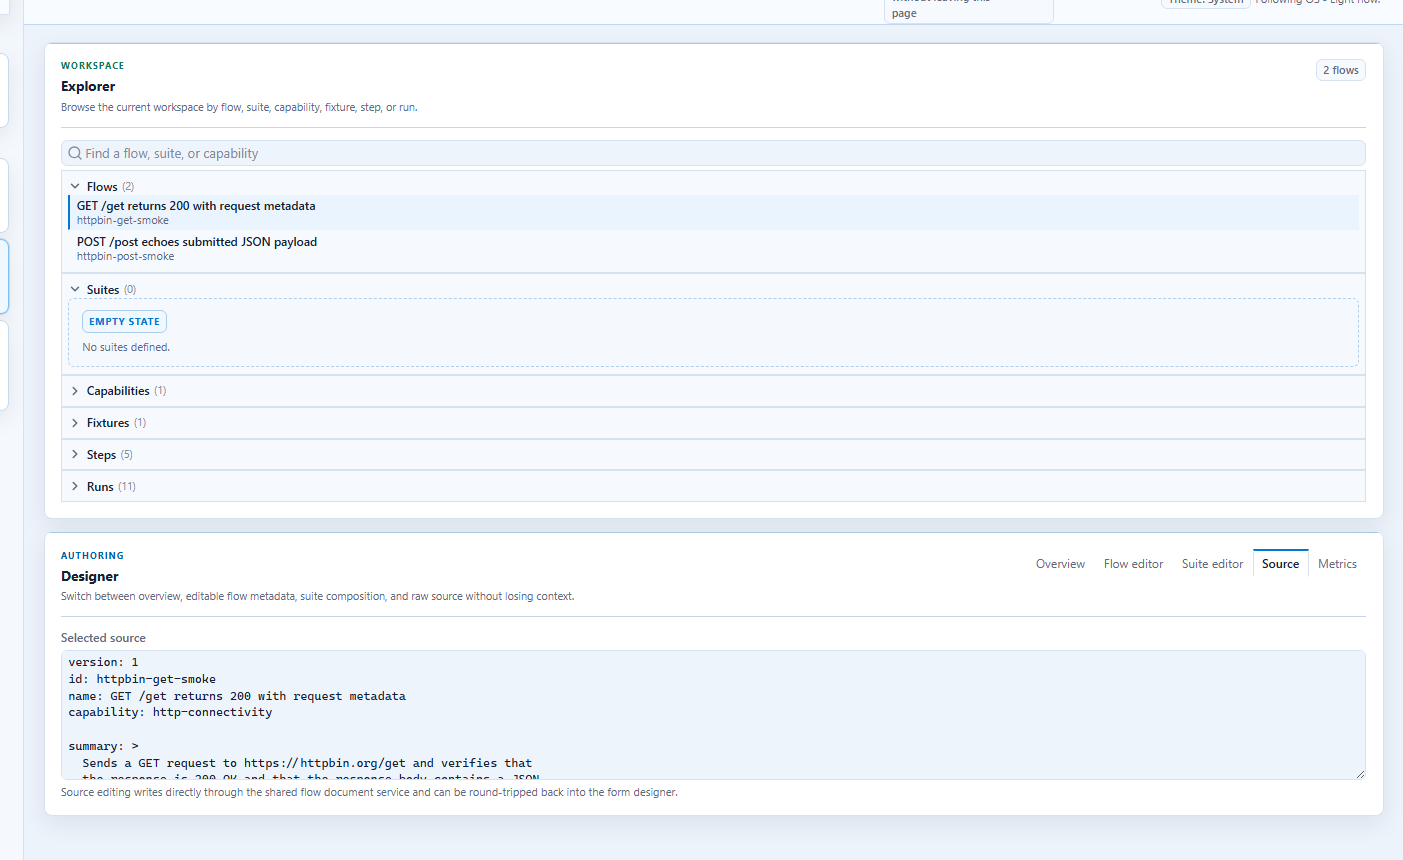
2. Open the project
Use Studio or Studio Web to open the Cress project that targets your app or suite.
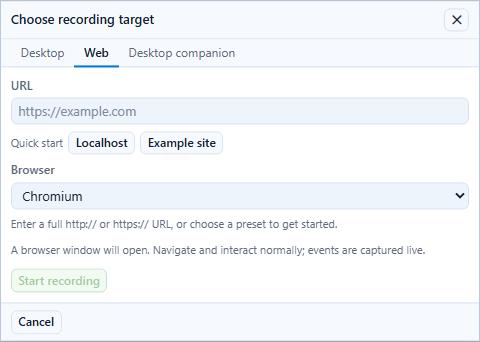
3. Pick the right target
For browser-focused scenarios:
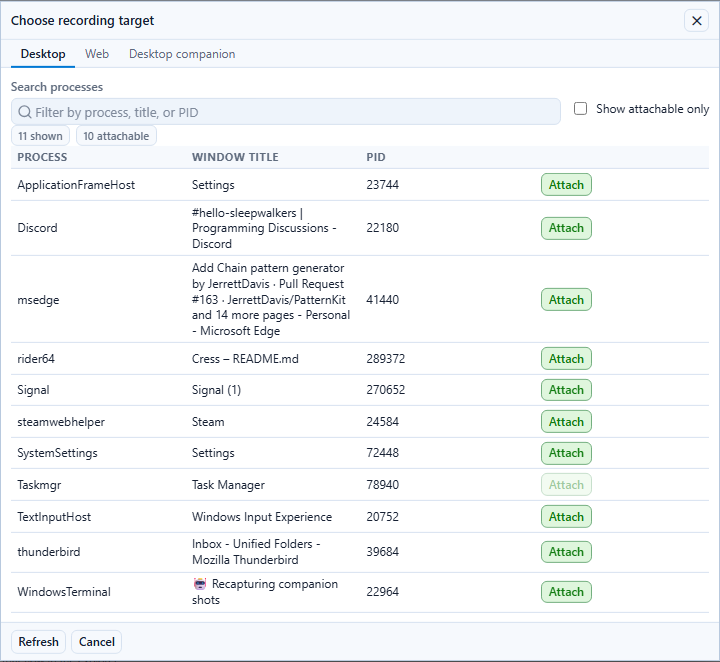
For Windows desktop scenarios:
4. Normalize the source
Once the first pass is recorded, move to Source view and turn it into a maintainable flow.
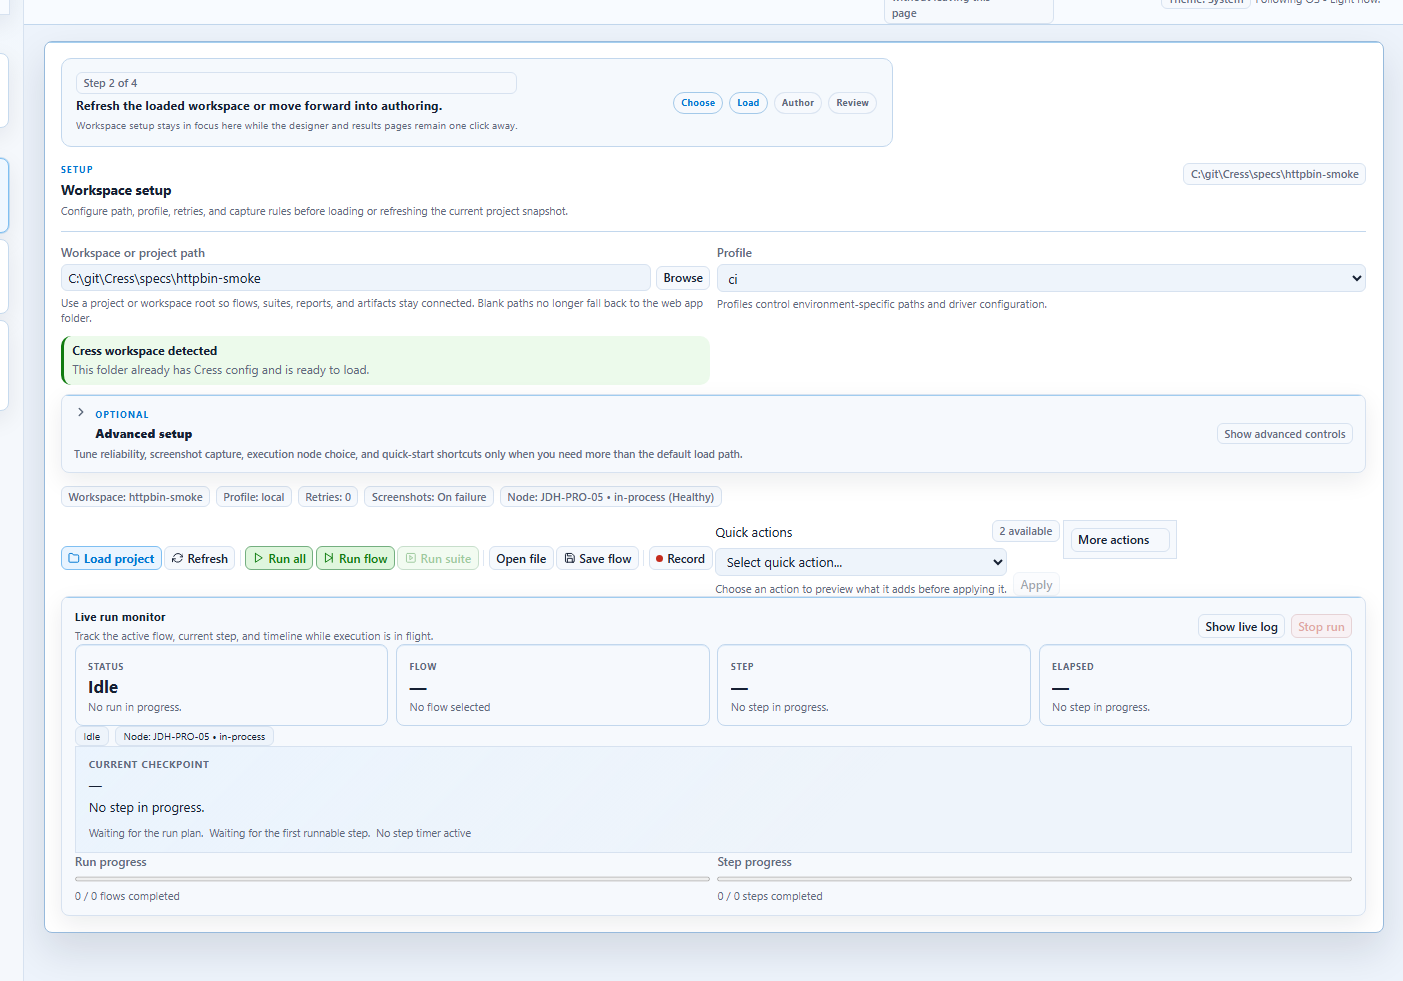
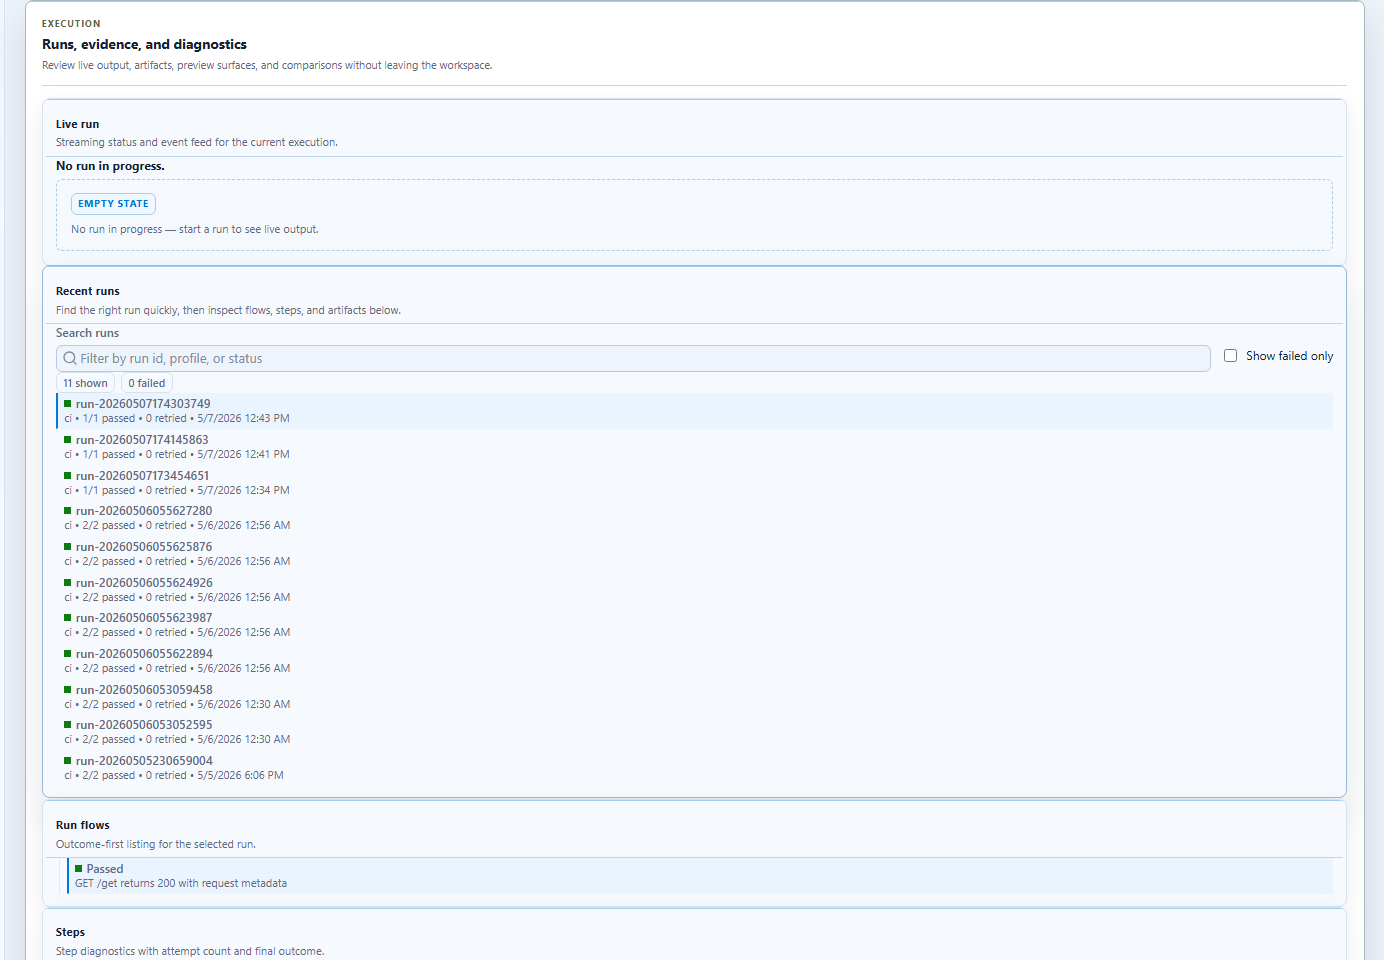
5. Run and inspect the result
Use the results panel to verify that the full environment wiring produced the expected evidence and side effects.
Step-by-step: code-first environment setup
Use this path when the team already has infrastructure code, startup scripts, or test projects that should own orchestration.
1. Start dependencies
Examples:
- Aspire AppHost
- Docker Compose
- service-specific launch scripts
- test-host fixtures in xUnit, NUnit, or MSTest
2. Put endpoints and environment choices in profiles
profile: ci
baseUrl: https://portal.contoso.test
variables:
  ordersApiBaseUrl: https://orders.contoso.test
  identityApiBaseUrl: https://identity.contoso.test
  environment: ci
timeouts:
  step: 30000
  expectation: 10000
3. Connect Cress to the system
Use the built-in and extension surfaces together:
httpdriver for services and APIsplaywrightdriver for web appsflawrightdriver for Windows desktop apps- plugin-backed steps for CLIs, data setup, or external-system bridges
4. Run directly or through a host framework
dotnet run --project src\Cress.Cli\Cress.Cli.csproj -- validate <cress-project>
dotnet run --project src\Cress.Cli\Cress.Cli.csproj -- run <cress-project> --profile ci --report html,json,junit
dotnet run --project src\Cress.Cli\Cress.Cli.csproj -- export xunit <cress-project> --flow <flow-id> --output <test-project>\Generated\<FlowName>.cs --profile ci
dotnet test <test-project>
Multi-service orchestration pattern
A realistic system often spans:
- an identity service
- one or more business APIs
- a browser UI
- a desktop client or internal tool
Cress can bridge those layers in one scenario design:
- seed data or authenticate through HTTP
- validate the user-facing browser or desktop behavior
- call a follow-up API assertion
- capture evidence in one run
Example: extending an AppHost for product services
The exact resource types depend on your app, but the shape often looks like this:
var builder = DistributedApplication.CreateBuilder(args);

var ordersApi = builder.AddProject<Projects.Contoso_Orders_Api>("orders-api")
    .WithExternalHttpEndpoints();

var identityApi = builder.AddProject<Projects.Contoso_Identity_Api>("identity-api")
    .WithExternalHttpEndpoints();

builder.AddProject<Projects.Contoso_Web>("portal")
    .WithReference(ordersApi)
    .WithReference(identityApi)
    .WithExternalHttpEndpoints();

builder.Build().Run();
Then point Cress profiles and generated framework tests at the endpoints that environment exposes.
Bridging GUI and code ownership
The strongest adoption pattern is usually:
| Role | Primary surface |
|---|---|
| Designer / QA / SDET | Studio or Studio Web for recording, source cleanup, and evidence review |
| Feature engineer | profiles, test projects, exporters, and PR integration |
| Platform / CI owner | environment orchestration, agents, secrets, and artifact publishing |
This gives teams both a GUI-based authoring experience and a code-based operational model.
Framework-hosted orchestration
If your team already uses xUnit, NUnit, or MSTest, use the generated test exports so the suite can run through dotnet test while still calling the Cress engine.
That gives you:
- framework-native discovery
- environment setup in test fixtures or host code
- Cress execution and evidence collection
- one workflow from local development to CI
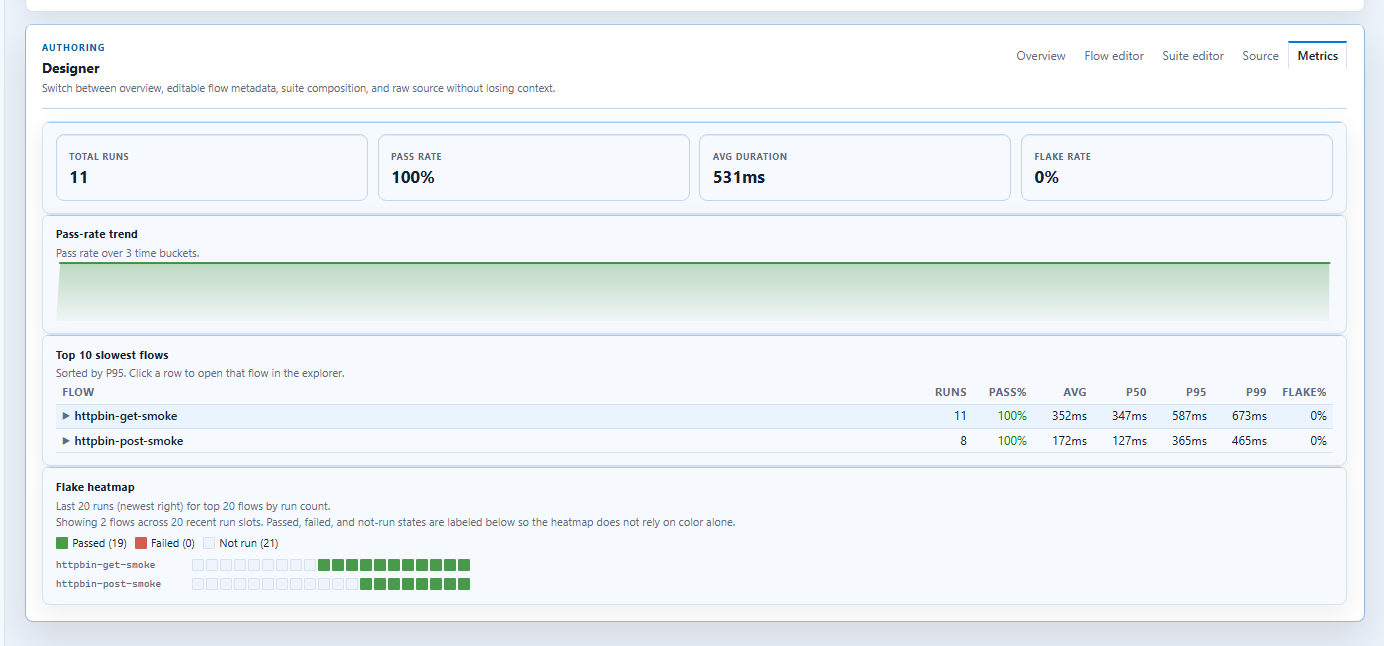
Observability and feedback
The metrics surface is useful once the environment and suite are in steady use, because it shows how orchestration choices affect test health over time.
Practical guidance
- keep environment-specific addresses and credentials in profiles
- keep business intent in flows rather than in startup scripts
- use plugins only for the glue that built-in drivers do not cover
- start with one stable end-to-end slice before expanding to every service or client
- publish both framework test results and Cress evidence artifacts in CI